The Super Admin and Squad Admin have their dashboard to view the key metrics on Retrospectives for their organization and team respectively.
Super and Squad admins are presented with the dashboard once they log on to Retroacto with their credentials. They can also reach the ‘Dashboard’ page by clicking the navigation menu on the left panel.
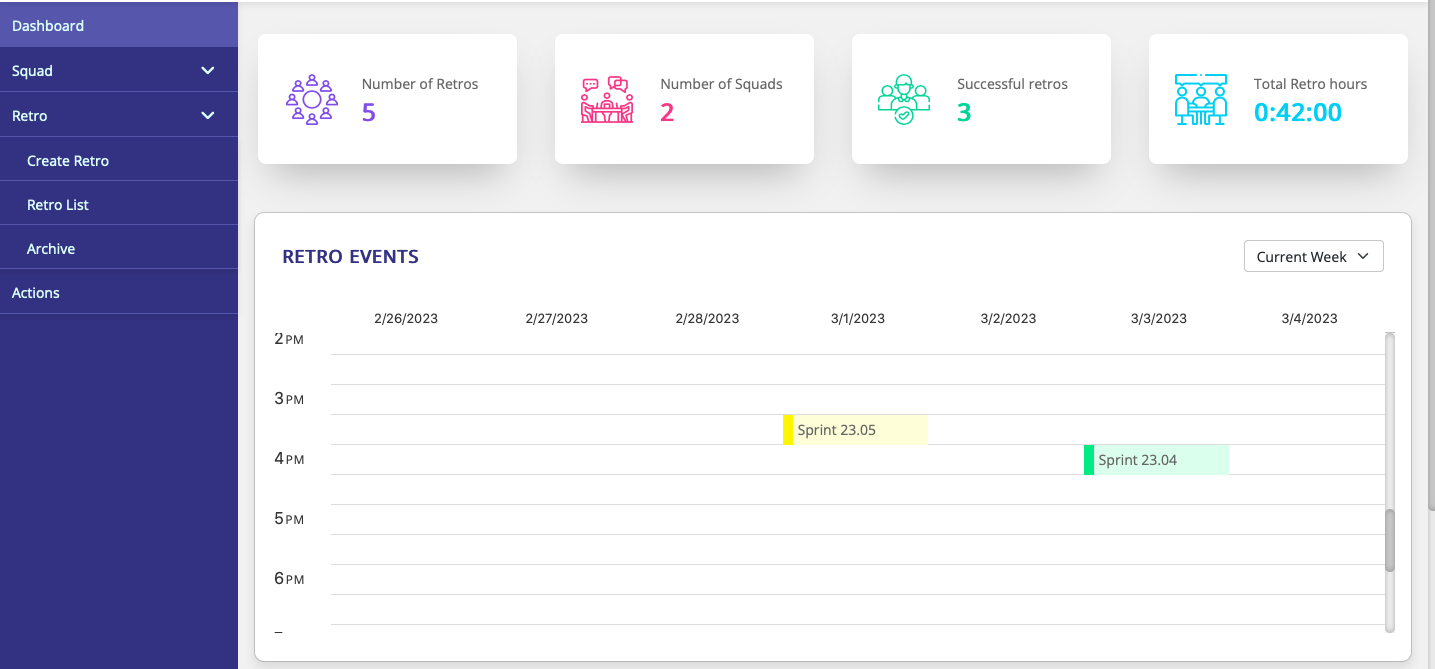
We are presenting 4 key metrics on the Dashboard for admins.
-
Total number of Retro’s created for the organization (Super Admin) and Squads (Squad Admin).
-
Total Number of Squads within the organization can be viewed by the Super admin and the Squad admin can view the number of squads they own.
-
Total number of successful retros conducted via Retroacto is presented as a third metric.
-
Total time spent on Retrospective is provided as a fourth metric.

Retro event calendar
The Super and Squad admin can view the scheduled retro across their organization and teams via the Retro events calendar.
By clicking the calendar, you will get redirected to the respective retro to start the event.
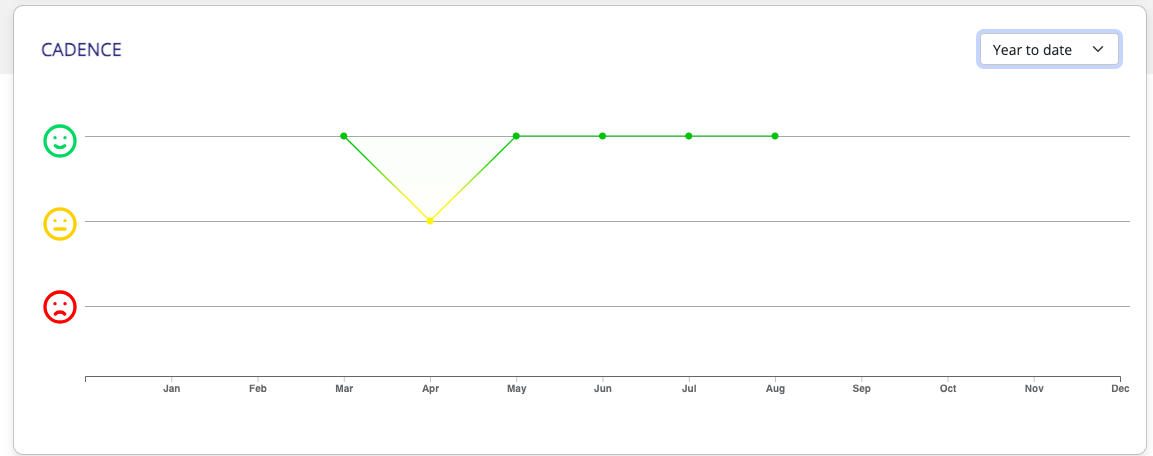
Cadence
The cadence graph depicts how the team’s mood tracking over a period of time. The super admin can view the aggregated team mood across the organization and the squad admin can view the aggregated team mood across the squads they own.
A squad is a group of people who work towards a defined outcome over a specified period.
! You will be able to create new squads and edit squad lead details only if you are the super admin for your organization. |
How to create a new squad?
After successfully logging into Retroacto as super admin, click on create squad under the squad menu. You will be redirected to the squad creation page.
-
Click on the ‘My Squad’ box if you are creating a squad for your own team
-
Enter your ‘Squad name‘, This is a mandatory field.
-
Upload a team logo (if you have one).
-
Enter a small description about your team.
-
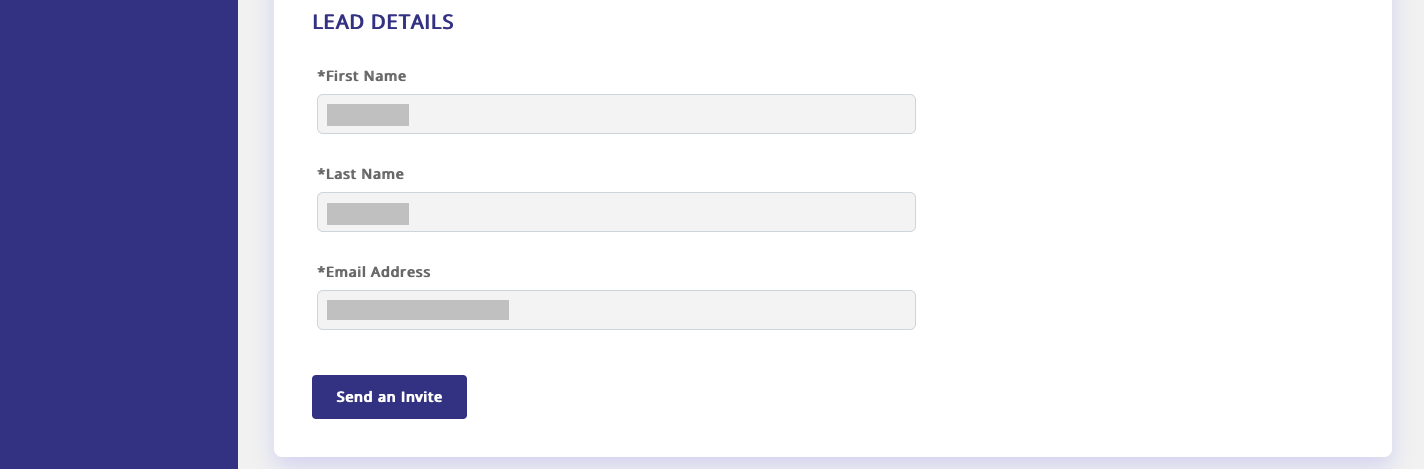
Enter the ‘First Name‘ of the squad lead, This is a mandatory field.
-
Enter the ‘Last Name‘ of the squad lead, This is a mandatory field.
-
Enter the ‘Email id‘ of the squad leader, This is a mandatory field.
-
Click on ‘Send Invite’ to create the squad and send an invite to the squad Lead.

How to view and manage squads?
After successfully logging into Retroacto, click on Squad List under the squad menu. You will be redirected to a page containing the list of squads
-
Click on the ‘Edit Squad‘ if you wish to edit your squad details
-
Modify your ‘Squad Name‘, This is a mandatory field
-
Modify your team logo (if you have one).
-
Update the description of your team.
-
Modify the ‘First Name‘ of the squad lead, This is a mandatory field.
-
Modify the ‘Last Name‘ of the squad lead, This is a mandatory field.
-
Modify the ‘Email id‘ of the squad leader, This is a mandatory field and only super admin can modify.
-
Click on ‘Save‘ to update the squad details and ‘Cancel’ to discard the changes.
! You will be able to modify only specific fields on squads based on your permission level. Only super admins can archive or delete squads. Similarly modifying squad admin email id is restricted for squad admins. |

Super Admin: Super admin is the person, who is more like an owner of the product within your organization, and by default, he has access to all the squads and retrospective data within the organization. Super admin creates and manages the squads within the organization. They can access Retroacto via their designated email id and password.
Squad Admin: Squad admin is the person, who is the leader of one or more squads or teams within your organization, and by default, he has access to the squads and retrospective data assigned under his portfolio. Squad admin can create and manage retrospective sessions for their team. They can access Retroacto via their designated email id and password.
Retro Participants: Retro participants are team members working for a team and join retrospective sessions with the invite link or event code provided by the squad or super admins. They don’t need to register with Retroacto to participate in Retrospective sessions and their participation is controlled by the other participants in the Retrospective session.
What is an Idea Canvas and its Purpose?
An Idea Canvas is a visual tool used to structure and evaluate new ideas. It provides a framework for organizing thoughts, assessing feasibility, and planning the implementation of an idea. The purpose of an Idea Canvas is to:
-
Structure Ideas: Provide a clear and organized way to outline all aspects of an idea.
-
Evaluate Feasibility: Help assess the potential impact, risks, and financial implications of an idea.
-
Facilitate Collaboration: Enable teams to work together to develop and refine ideas.
-
Support Decision-Making: Provide a comprehensive overview of an idea to inform go/no-go decisions.
-
Track Progress: Monitor the idea through different stages of development.
Creating and Maintaining an Idea Canvas
The following steps outline how to create and maintain an Idea Canvas, based on the provided screenshots:
1. Accessing the Idea Canvas
-
To access the Idea Canvas, navigate to the main page and locate the “Idea Canvas” under portfolio section.
-
Here, you can view existing ideas and their statuses.
-
Use the “Status” dropdown menu to filter ideas by their current stage (Draft, Review, Approved, Hold, Rejected).
-
Click the “Add Idea” button to create a new Idea Canvas.
2. Creating a New Idea Canvas
-
Clicking “Add Idea” will open a “New Idea” form.
-
Idea Title: Enter a concise and descriptive title for your idea.
-
Submitter: Enter the name of the person submitting the idea.
-
Sponsor: Enter the name of the project sponsor.
-
Business Area: Specify the relevant business area for the idea.
-
Submission Date: The date will be automatically populated.
3. Describing the Idea (Description Tab)
-
The Idea Canvas is organized into several tabs Description, Impacts, Finance, Risks, and Value Drops.
-
In the “Description” tab, provide a detailed explanation of the idea.
-
The Why? Clearly state the problem or opportunity that the idea addresses.
-
Outcome: Describe the desired outcome or solution.
-
Impact of Not Doing: Explain the consequences of not pursuing the idea.Use Shift + Enter to create new lines within the text fields.
4. Assessing the Impacts (Impacts Tab)
-
In the “Impacts” tab, evaluate the potential effects of the idea on various areas.
-
For each category (Customer, People, Brand, Reputation, Products/Services, Partner, Vendor, Technology), select the level of impact (e.g., Minor, Major) from the dropdown menu.
5. Evaluating Financial Aspects (Finance Tab)
-
The “Finance” tab is used to assess the financial viability of the idea.
-
Spending:
-
Enter the estimated costs for “People Cost” and “Other Resources.”
-
The “Total” cost will be automatically calculated.
-
-
Return on Investment:
-
Specify the “Years” for the ROI calculation.
-
Enter the projected financial returns for each year (Y1, Y2, Y3, etc.).
-
6. Identifying Potential Risks (Risks Tab)
-
The “Risks” tab allows you to identify and assess potential risks associated with the idea.
-
For each risk:
-
Enter a “Risk Title.”
-
Provide a “Risk Description.”
-
Specify the “Status” of the risk.
-
-
Click the “Add” button to add more risks.
7. Defining Value Drops (Value Drops Tab)
-
The “Value Drops” tab is used to define the specific value drops and their timelines.
-
For each value drop:
-
Enter a description of the “Value Drop.”
-
Specify the “Timeline” for the value drop.
-
-
Click the “Add” button to add more value drops.
8. Saving and Managing Ideas
-
Ideas are saved as you complete each section.
-
You can navigate between tabs to modify different aspects of the idea.
-
Once an idea is submitted, it will be assigned a status, which can be tracked on the main Idea Canvas page.
By following these steps, you can effectively use the Idea Canvas to create, evaluate, and manage your ideas throughout their lifecycle.
1. What is Project Portfolio Management and its Purpose?
Project Portfolio Management is a strategic approach to managing a collection of projects and initiatives in a unified manner. It involves selecting, prioritizing, and controlling these projects to align with an organization’s strategic goals and objectives.
The purpose of Project Portfolio Management is to:
-
Strategic Alignment: Ensure that the projects and initiatives undertaken by an organization directly contribute to its overall strategic direction.
-
Resource Optimization: Efficiently allocate and manage resources (e.g., personnel, budget, equipment) across the portfolio to maximize their utilization and avoid overallocation.
-
Risk Management: Identify, assess, and mitigate risks associated with individual projects and the portfolio as a whole.
-
Performance Measurement: Track and monitor the progress and performance of projects and initiatives to ensure they are delivering the expected benefits.
-
Decision Making: Provide decision-makers with the information and insights they need to make informed choices about which projects to invest in, continue, or terminate.
2. Creating a Portfolio Item (Project or Initiative)
The following outlines the process for creating a new project or initiative within the Project Portfolio Management system.
2.1 Navigation
To begin, navigate to the “Portfolio” section in the main menu and select “Create Portfolio”.
2.2 Basic Information
The “Create Portfolio” screen will appear, prompting you to enter key details.
-
Type: Select whether you are creating an “Initiative” or a “Project” from the dropdown menu.
-
Title: Provide a clear and concise title for the project or initiative.
-
Initiative Lead: Assign a lead person responsible for the project or initiative. Select from the available options.
-
Initiative Sponsor: Designate a sponsor for the project or initiative. Select from the available options.
-
Acronym: Enter a short acronym for easy identification.
2.3 Detailed Information Tabs
The creation screen is organized into several tabs to capture comprehensive information:
-
Description:
-
Current Scenario: Describe the current situation or problem that the project/initiative aims to address. Use “Shift + Enter” to create new lines.
-
Desired Outcome: Specify the intended results or benefits of the project/initiative. Use “Shift + Enter” to create new lines.
-
Exclusions: List any elements that are outside the scope of the project/initiative. Use “Shift + Enter” to create new lines.
-
-
Reference:
-
Parent: If applicable, link this project/initiative to a parent project or initiative.
-
Business Division: Specify the relevant business division.
-
Expense Type: Categorize the type of expenses associated with the project/initiative.
-
Labels: Add labels for categorization and filtering.
-
Attachment: Upload relevant files (PDF, PPT, PPTX, DOC, DOCX, XLS, XLSX).
-
Comments: Add any relevant comments. Use “Shift + Enter” to create new lines.
-
-
Schedule:
-
-
Planned Start: Enter the planned start date.
-
Planned End: Enter the planned end date.
-
Duration: The system may automatically calculate the duration based on the start and end dates.
-
Comments: Add schedule-related comments. Use “Shift + Enter” for new lines.
-
History: View the history of schedule changes.
-
-
Cost:
-
-
-
Estimated Budget: Enter the estimated budget.
-
-
-
Actual Spent: Record the actual amount spent.
-
Estimate At Complete (EAC): Provide an estimate of the total cost at project completion.
-
Variance: The system may calculate the variance between the budget and actual costs.
-
Comments: Add cost-related comments. Use “Shift + Enter” for new lines.
-
-
Status:
-
-
Overall Status: Indicate the overall status (e.g., Green, Amber, Red).
-
Scope: Assess the current status of the project scope.
-
Cost: Evaluate the cost status.
-
Schedule: Evaluate the schedule status.
-
RAID: Manage Risks, Assumptions, Issues, and Dependencies.
-
2.4 Saving
After entering all the necessary information, click the “Save” button to create the project or initiative.
3. Viewing Created Projects and Initiatives
view the created projects and initiatives:
-
Navigate to the “Portfolio” section in the main menu.
-
Select “Portfolio List”.
The “Portfolio List” displays a summary of all projects and initiatives. Each item is typically shown in a card format, providing key information such as:
-
Title of the Project/Initiative
-
Project/Initiative ID
-
Start Date
-
Sponsor
-
Lead
-
Status
3.1 Project/Initiative Actions
Each project or initiative card may provide options to:
-
View Details: Access the full details of the project or initiative.
-
Change Status: Update the status (e.g., Hold, Complete, Cancelled).
-
Generate Report: Create a report on the project or initiative.
1. What is Backlog Management and Why is it Important in the Software Delivery Lifecycle?
Backlog management is the process of creating, prioritizing, and maintaining a list of work items that need to be completed in a software development project. This list, known as the backlog, serves as a single source of truth for what needs to be delivered and provides a roadmap for the development team.
Importance of Backlog Management in the Software Delivery Lifecycle:
-
Prioritization: It allows for the prioritization of features, bug fixes, and other tasks, ensuring that the most valuable work is tackled first.
-
Transparency: It provides transparency to all stakeholders (developers, product owners, management) regarding the project’s scope and progress.
-
Planning: It facilitates release and sprint planning by providing a clear view of the work items that need to be included.
-
Flexibility: It enables adaptability to changing requirements and priorities throughout the development process.
-
Efficiency: It improves development team efficiency by providing a well-organized and clearly defined set of tasks.
2. Backlog Interface
The main backlog interface displays a list of work items, organized with key information for each item.
-
Taxonomy: Categorizes the work item (e.g., Initiative, Project, Feature, Epic, Story, Task, Bug).
-
Title: A descriptive name for the work item.
-
Status: The current state of the work item (e.g., In Progress, Test, Refinement, New).
-
Owner: The person responsible for the work item.
-
Planned Start: The intended start date for the work.
-
Planned End: The intended completion date for the work.
-
Priority: The level of importance assigned to the work item.
The interface also includes:
-
-
Filtering: Options to filter work items by type (Story, Task, Bug) and potentially other criteria.
-
Search: A search bar to find specific work items.
-
View Options: Display options (e.g., List view, Board view).
-
Create Button: A button to create new work items.
-
3. Creating a Work Item
To create a new work item, use the “Create” button in the backlog interface.
3.1 Work Item Details
The “Create Work Item” screen prompts for the following information:
-
-
Type: Select the type of work item from the dropdown menu (Feature, Epic, Story, Task, Bug).
-
Title: Enter a descriptive title for the work item.
-
Owner: Assign the work item to a specific person.
-
Reporter: The person who reported or created the work item.
-
Priority: Set the priority level.
-
Release Version: Associate the work item with a specific release version (if applicable).
-
3.2 Detailed Information Tabs
The work item creation screen is organized into several tabs to capture comprehensive information:
-
-
-
Description:
-
Narrative: A detailed description of the work item. Supports rich text formatting.
-
Outcome: Describes the expected result or benefit of the work item.
-
-
-
-
-
-
Reference:
-
Parent: Links the work item to a parent work item (e.g., an story to an epic).
-
Labels: Tags for categorization and filtering.
-
Attachment: Ability to upload relevant files.
-
Comments: Space for discussions and notes.
-
-
-
-
-
-
Requirements:
-
Define specific requirements for the work item, including ID, Title, Description, Acceptance Criteria, and Status.
-
Ability to add multiple requirements.
-
-
-
-
-
-
Schedule:
-
Planned Start: The intended start date.
-
Planned End: The intended end date.
-
Planned Effort: Estimated work effort (e.g., in hours).
-
Duration: Estimated duration (e.g., in days).
-
Size: Estimation of the work item’s size or complexity (e.g., story points).
-
-
-
-
-
-
Impact:
-
Squad: Indicates the team or squad responsible for the work item.
-
-
-
4. Saving Work Items
Click the “Save” button to create or update the work item with the entered information.
Sources and related content.
A Retro is a structured session on an iterative agile journey that provides an opportunity for teams to reflect on past work and identify ways to improve. Teams hold retrospective meetings after a time-boxed period of work is complete, typically end of each sprint.
How to create a new Retro Session?
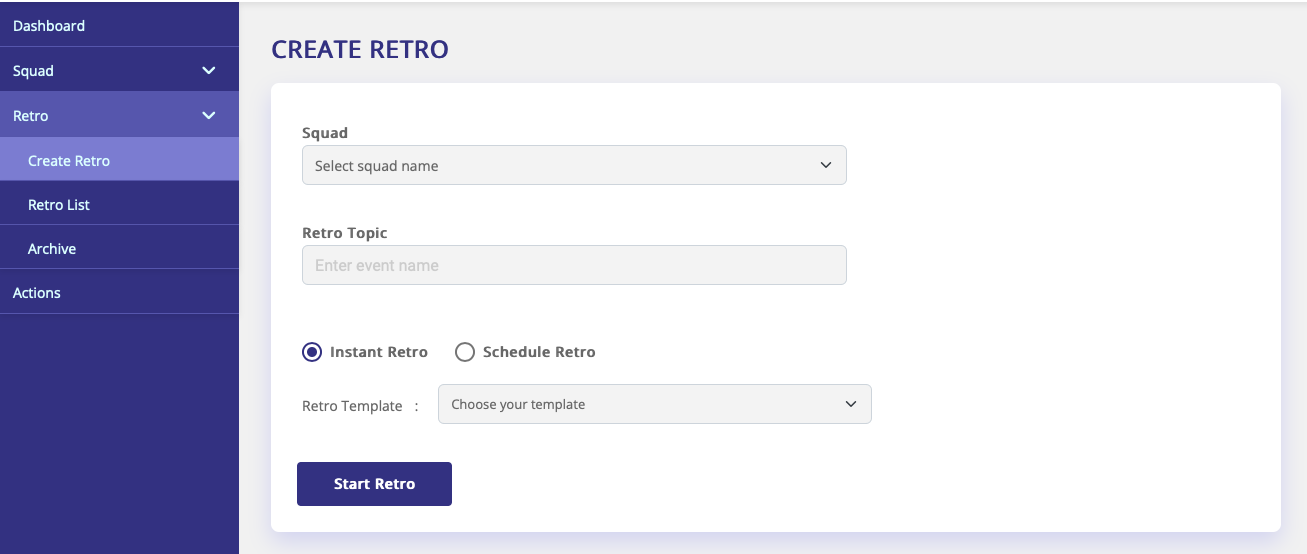
After successfully logging into Retroacto, click on Create Retro under the Retro menu. You will be redirected to the Retro creation page.
Instant Retro
-
Choose the ‘Squad’ from the drop-down for the Retro session to be conducted. This is a mandatory field.
-
Enter your ‘Retro Title’, This is a mandatory field.
-
Choose ‘Instant Retro’ if you want to start the session immediately. This is a mandatory field.
-
Choose ‘Retro Template‘ from the drop-down on the topic you wish to run the Retro. This is a mandatory field.
-
Click on ‘Create Retro‘ to create the Retro session.
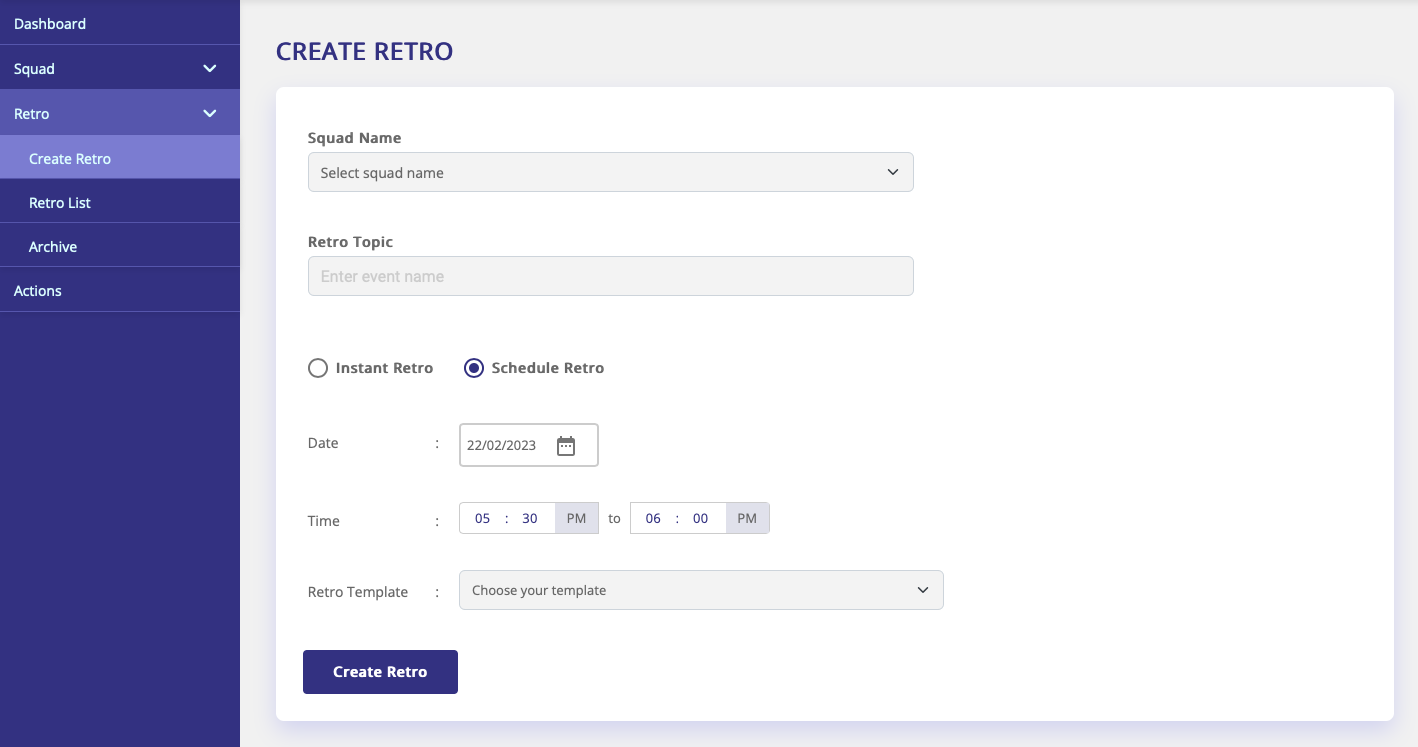
Scheduled Retro
-
Choose the ‘Squad’ from the drop-down for the Retro session to be conducted. This is a mandatory field.
-
Enter your ‘Retro Title’, This is a mandatory field.
-
Choose ‘Scheduled Retro‘ if you want to run the retro on a future date and time. This is a mandatory field.
-
Choose ‘Retro Template‘ from the drop-down the topic you wish to run the Retro. This is a mandatory field.
-
Click on ‘Create Retro‘ to create the Retro session.
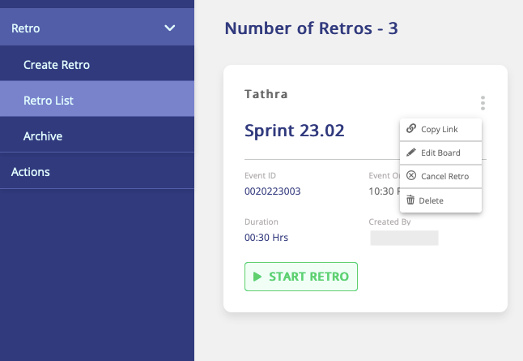
How to view and manage scheduled Retro session?
-
Click on ‘Copy Link’ to copy the meeting invite into a clipboard.
-
Click on ‘Edit Board’ to modify the retro session details including Squad, Retro Title, Retro Template, and Retro schedule.
-
Click on ‘Cancel Retro’ to cancel the Retro session.
-
Click on ‘Delete Retro’ to delete the Retro session.
Retrospective sessions are one of the official ceremonies of the scrum methodology. Facilitated by a scrum master this session hosts the entire scrum team including developers, quality engineers, and product owners. Retrospective sessions are usually conducted at the end of every iteration or sprint focusing on the team’s reflection from the past and identifying the ways to improve.
According to the Agile principle manifesto “At regular intervals, the team reflects on how to become more effective, then tunes and adjusts its behavior accordingly.”, these sessions are used to implement this principle.
How to start a new Retro session?
The Retro sessions can be started in two ways in Retroacto.
Instant Retro
1. Choose the ‘Squad‘ from the drop-down for the Retro session to be conducted.This is a mandatory field.
2. Enter your ‘Retro Title‘, This is a mandatory field.
3. Choose ‘Instant Retro‘ if you want to start the session immediately.This is a mandatory field.
4. Choose ‘Retro Template‘ from the drop-down on the topic you wish to run the Retro. This is a mandatory field.
5. Click on ‘Create Retro‘ to create the Retro session.
A new retro session is created on a pop-up window as shown below
! Ensure pop-up’s are not blocked for your browser. |
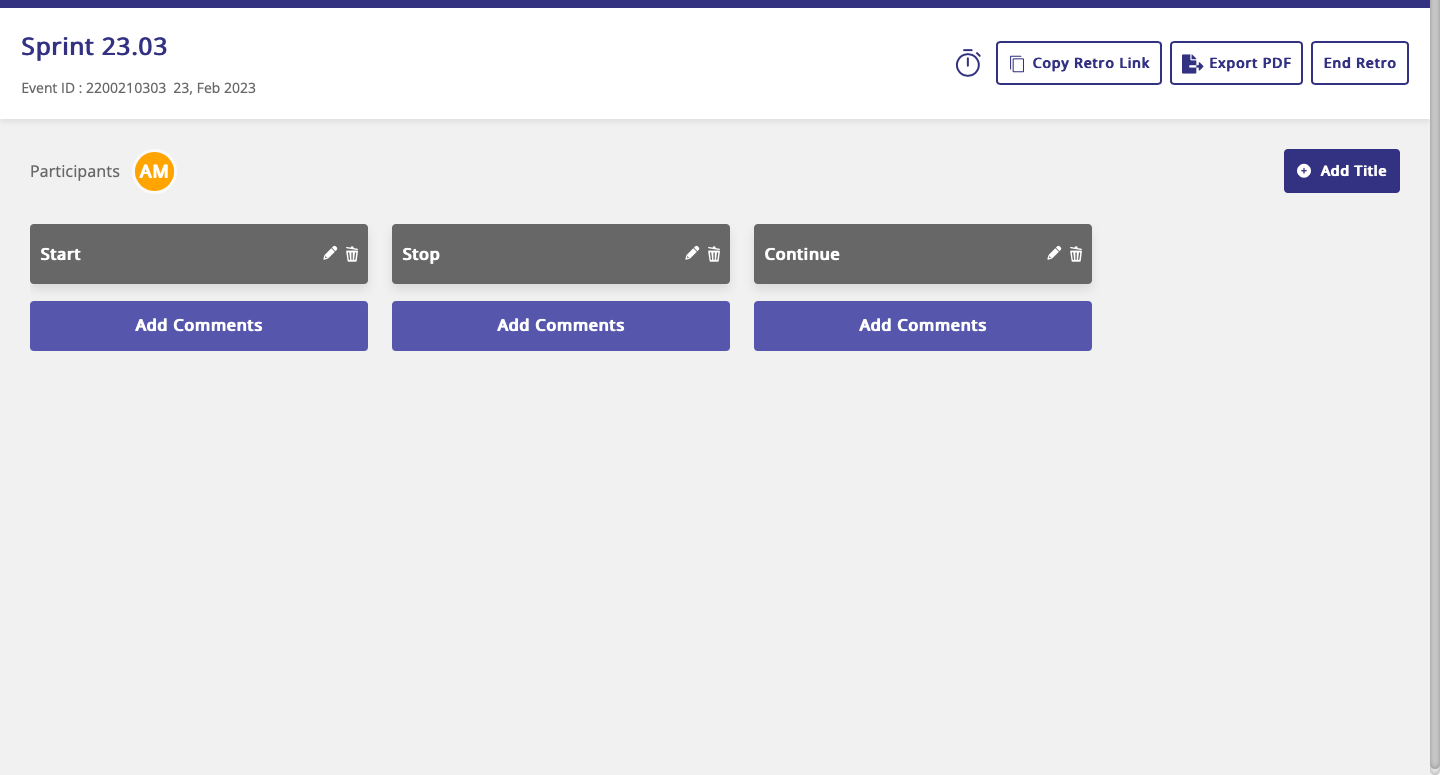
The small little timer clock on the screen allows the session admin to run the time-boxed events during the retrospective sessions. At the end of the specified time frame, a sound gets emitted to participants and admin sessions.
Click on the ‘Play button’ to start the timer clock.
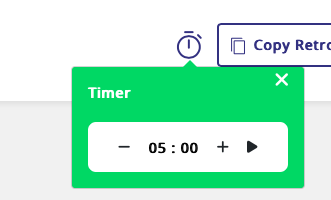
Click on the ’Copy button’ to copy the meeting link into a clipboard to share it with participants via your meeting invite.

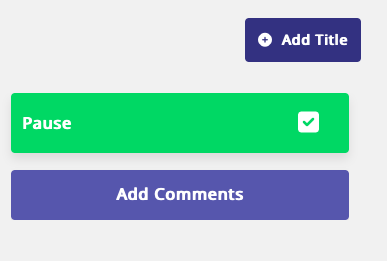
Clicking on ’ Add Title’ will allow the session admins to add a new column to the existing template. Click on the small right green tick button to save the new column.
! Only Super admins and Squad admins can add, edit and delete the Retro titles within the session.! Deleting a column title will delete all the cards underneath that column. |
How to join a Retro Session?
Participants can join a Retro session in two ways.
- If the participant knows the event id, they can simply join by clicking the ’Join Retro’ button on the Retroacto homepage.

The participant will be redirected to a page to enter their name and event id.
-
They can also join the session via the full link received from the session organizer or the participant from the copied link on the clipboard.
The participant will be redirected to a page to enter their name.

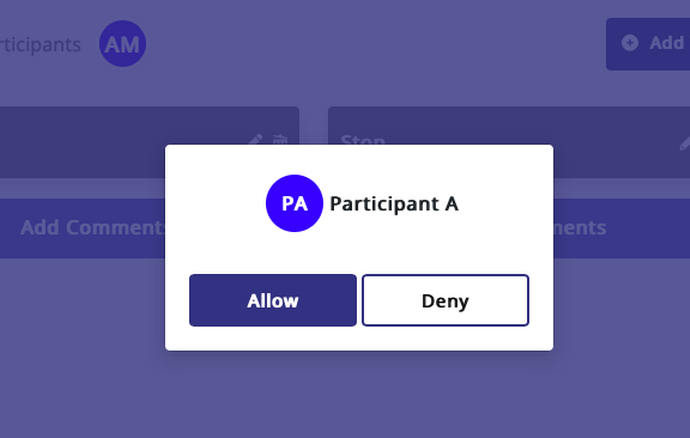
The entry or denial to the sessions is actioned by already existing participants or session admins.
A pop-up window appears on retro sessions to ‘Allow’ or ‘Deny’ user entry.
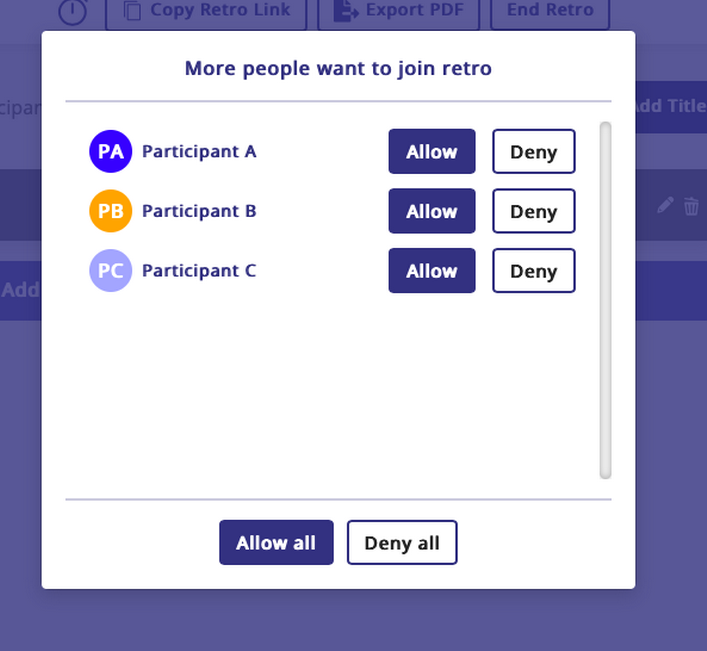
When multiple people are trying to join the session at the same time, the following pop-up window appears on the session to allow all the participants into the session.
The number of participants in the session can be seen through the following section on the retro session.
How to actively participate in a Retro Session?
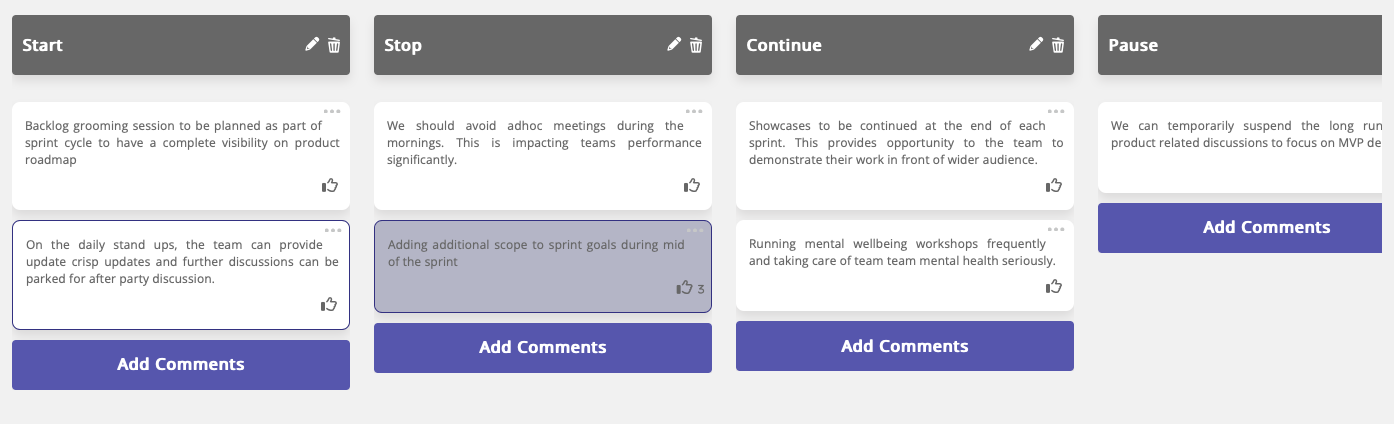
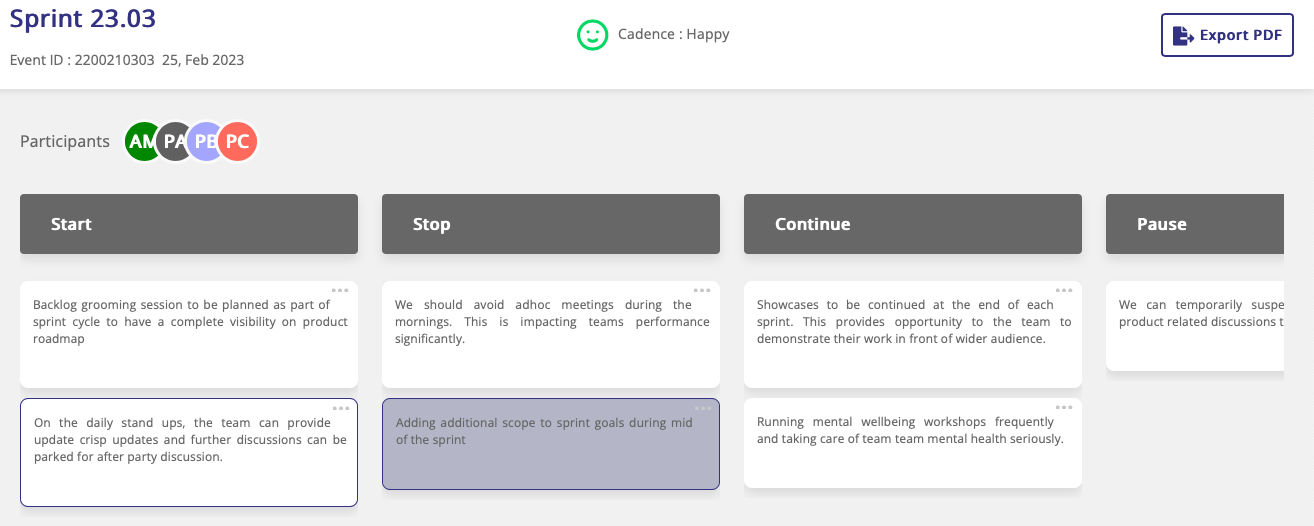
Once the Retro session is commenced, participants and session admins can add their comments against the respective topic.
People are allowed to modify or delete any card within the session. This is to provide greater flexibility to the team in managing cards within the session.
The comment which needs high attention is noted on a highlighted color based on participants voting against the card. If more than 50% of people in the session vote for a card, this gets highlighted for getting additional traction during the discussion.
The card can be dragged to any column by anyone participating in the session.
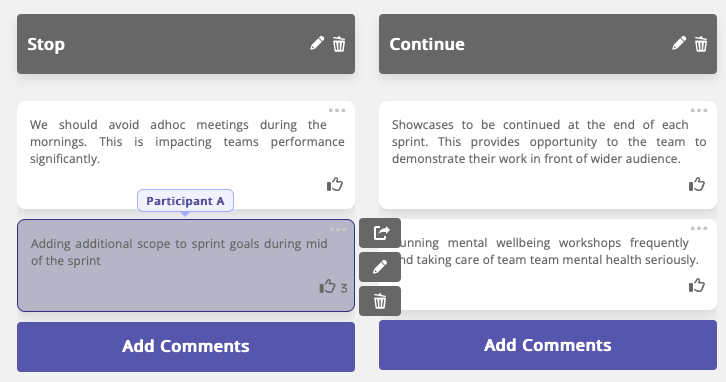
How to manage cards during the Retro Session?
Retroacto provides greater flexibility to the retro participants in managing their cards during the session.
-
We can create an action from a card by simply clicking the three dots on the card and then clicking the convert action icon.
-
The card can be edited by anyone by simply clicking three dots on the card and the edit icon.
-
The card can also be deleted by anyone by simply clicking three dots on the card and the delete icon.
How to create an action from a card during the Retro session?
Creating an action from a card is very simple in Retroacto. By clicking the three dots on a card and then clicking the convert to action icon.
A new pop-up window appears on the screen to create a new action.
-
Enter an action title.
-
The description filled is automatically populated from the information provided on the card. This can be modified to reflect the action description.
-
Assign an owner to the action.
-
Click on the ‘Save’ button to create the action.

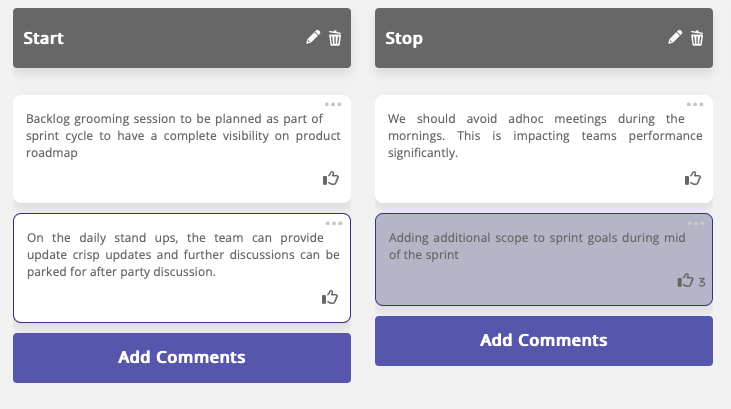
How to identify the comments which triggered an action?
The card which triggered an action during the retrospective session can be identified by a colored border card as shown below.
What is the cadence in Retroacto?
Cadence is a unique feature built by Retroacto to understand a quick reflection of team sentiment during the last iteration or sprint. Cadence measures the team sentiment on the scale of smiley faces.
 A ‘Happy’ smile reflects the overall team sentiment was good during the last iteration or sprint.
 A ‘Flat’ smile reflects, the team felt moderate (neither felt good nor bad) during the last iteration or sprint.
 A ‘ Sad’ smile represents, the team felt bad during the last iteration or sprint.
How does the cadence work?
At the end of the Retrospective session, the Squad or Super admin running the session presses the ‘End Retro’ button on the Retro session. Once this button is pressed the following screen appears on every participant screen.
The participants are free to choose an option from the smileys. If the participant is not interested in providing feedback, they can click on the ‘Not Interested’ button.
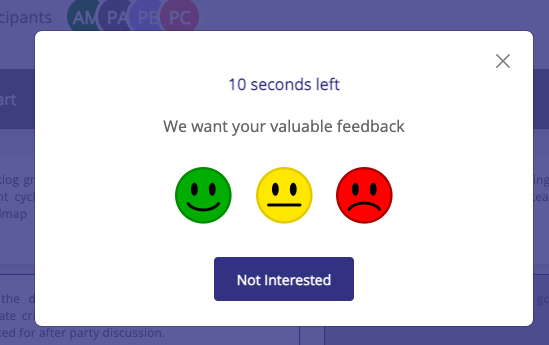
Each button on the screen has a score associated with it and the Retroacto sentiment analysis engine derives overall team sentiment based on the response provided by the team.
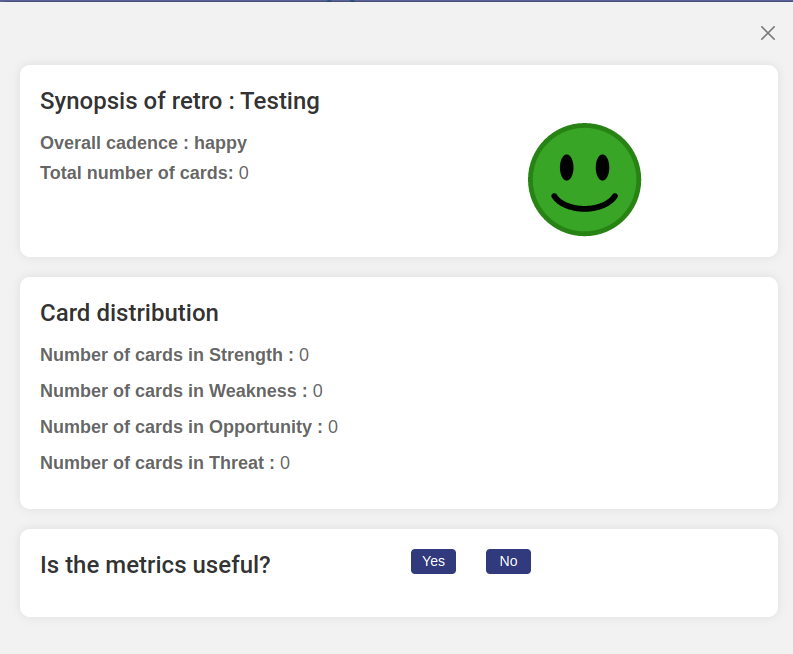
This will become the final cadence for that sprint and stored in the sprint history.
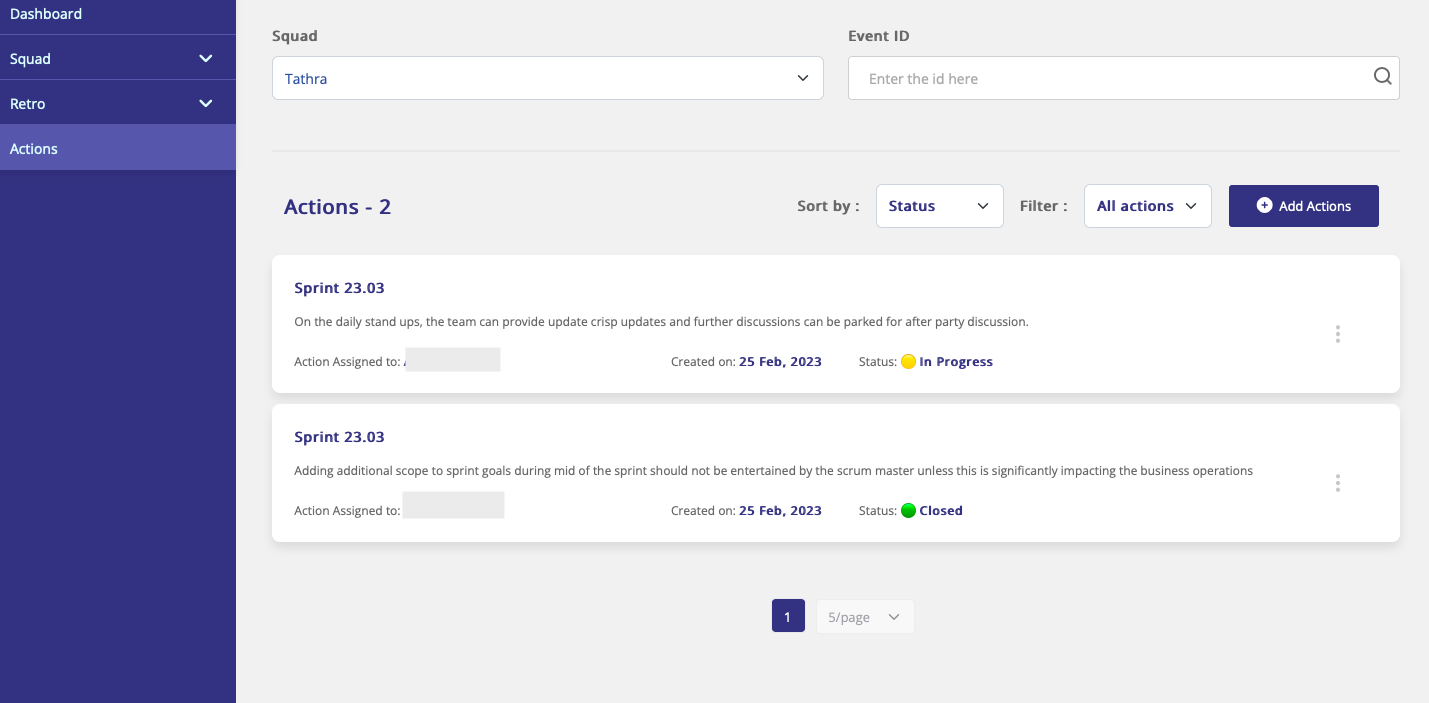
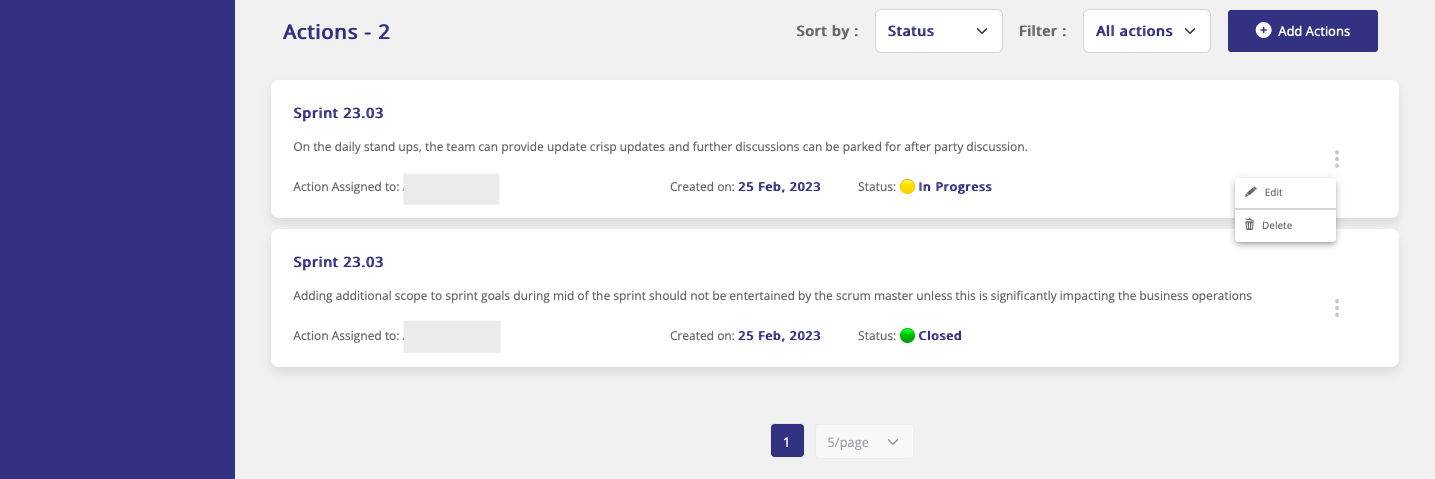
How to view all the actions?
The actions can be viewed by clicking ‘Actions’ from the menu.
-
The actions can be searched through squad and event id.
-
The actions can be filtered through their status.
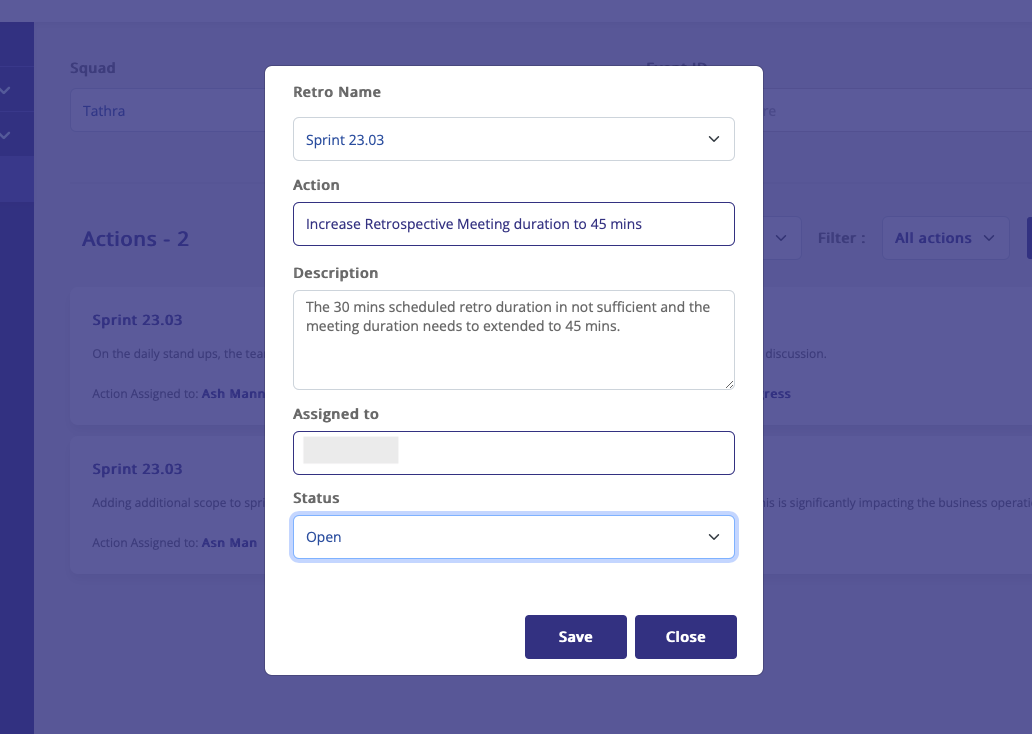
How to add a new action?
-
Click on the ‘Add Actions’ button to add a new action.
-
Choose the respective sprint from the drop-down.
-
Add a suitable title in ‘Add title’</span.
-
4. Add a brief description in ‘Add Description’.
-
Add the action owner in ‘Assignee’.
-
Choose the right status of the action from ‘Status’.
-
Click on ‘Save’ to create a new action.
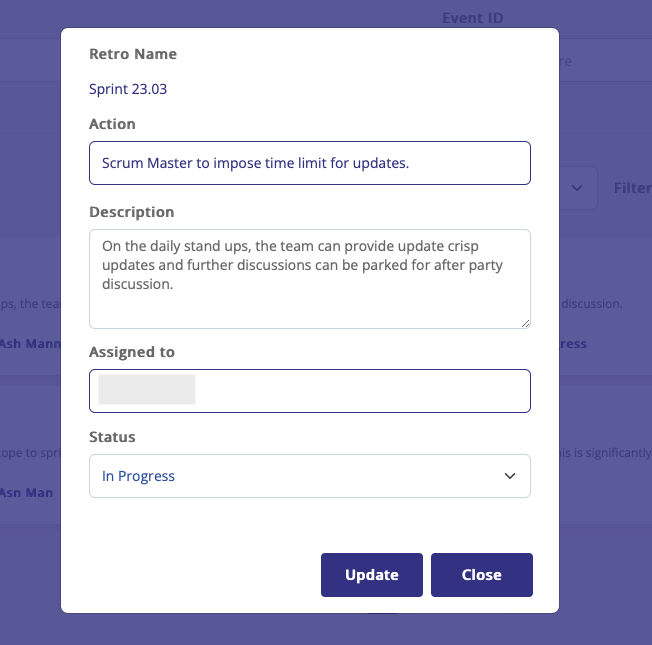
How to edit or delete the action?
-
The existing actions can be edited by clicking the three dots and the ‘Edit’ button to edit an action.
-
The existing actions can also be deleted by clicking the three dots and the ‘Delete’ button to delete an action.
The following screen pops up and lets the super or squad admins edit actions.
-
Update the required field on the action.
-
Click on the ‘Update‘ button to save the action.